How to Turn Photos into Videos: Simple Guides & AI‑Powered Creativity

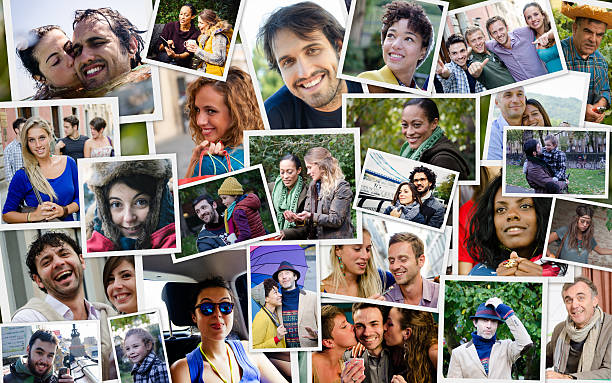
Creating a video out of photos is like turning the pages of a photo album into a movie. With easy‑to‑use apps and AI‑powered tools, you can transform static images into engaging stories that capture attention on social media or preserve precious memories.
This guide explores free methods, online tools, AI apps and creative tips, all written in a friendly tone that reflects FaceSwapAI’s playful and imaginative spirit. Let your imagination take over and discover how to make photo a video.
Key Takeaways
- Turn still shots into dynamic stories. Free apps and online editors let anyone upload photos, arrange them on a timeline, add music and text, then export a polished video. It takes just a few clicks to move from static images to a flowing slideshow.
- AI makes video creation effortless. New AI‑powered tools, including FaceSwapAI’s Image‑to‑Video feature, automatically animate a single photo into a short clip, letting your imagination run wild without any editing experience.
- You can do it from any device. Whether you’re using an online tool, your smartphone’s photo editor or an iPhone app, the process is similar: select pictures, choose a style, add transitions and music, then share your creation.
- Face Swap AI adds a playful twist. Beyond basic slideshows, FaceSwapAI’s face‑swap and video templates invite you to experiment with identities, characters and even create cinematic sequences, all with privacy‑first technology and friendly guidance.
Free Ways to Make a Video from Photos
If you’re just starting out, free options are plentiful. Microsoft Photos (Windows), Clipchamp (Windows/web), Google Photos (Android/iOS) and iMovie (macOS/iOS) let you build a simple slideshow without spending a cent—though free plans may limit resolution or branding.
Here’s the typical process:
Step 1. Gather your images.
- Pick the pictures you want and save them in a folder.
- High-resolution photos with good lighting work best.
- Avoid blurry or low-light shots because they’ll look worse when enlarged on screen.
Think about how the images tell a story. For example, chronological order works well for birthdays or travel adventures, while a theme‑based sequence suits product showcases or mood boards.
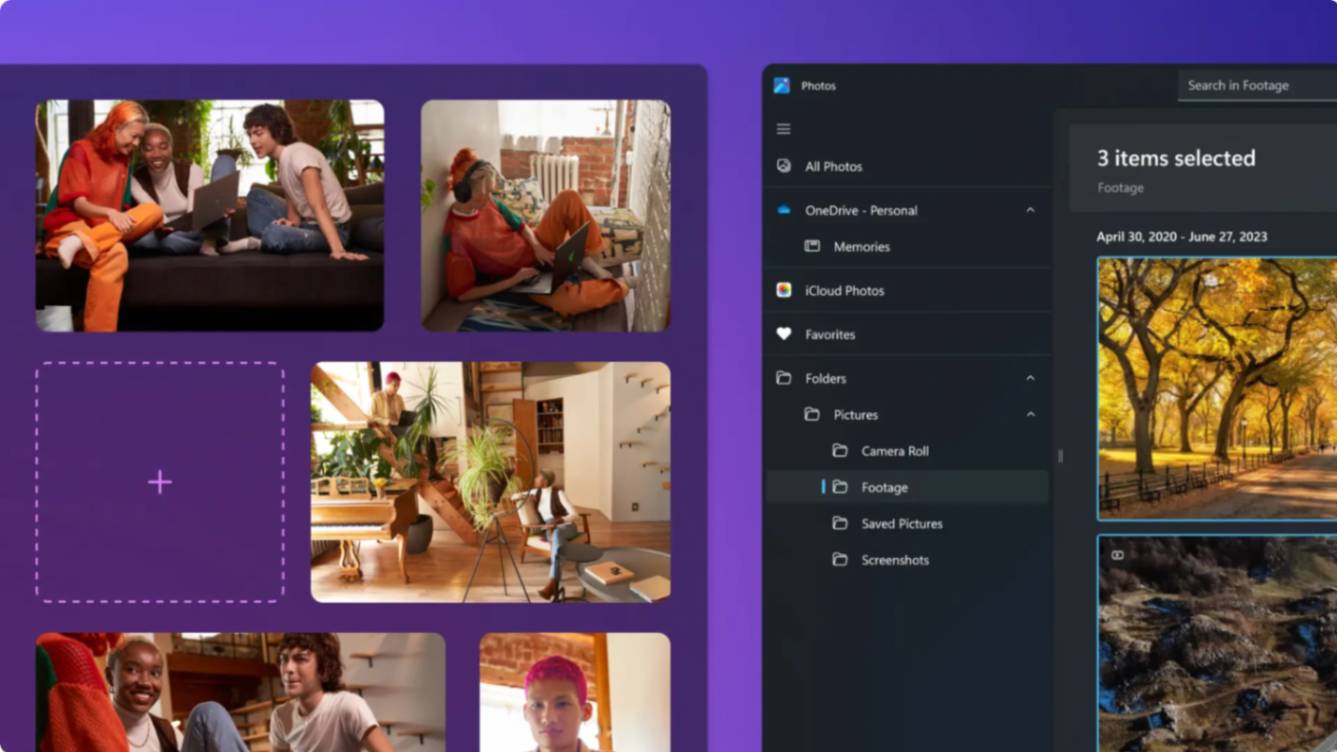
Step 2. Start a new project and upload your photos.
- In the Photos app (Windows 10/11 legacy), you might click Video Editor → New video project to drag your pictures into the storyboard.
- In Clipchamp, you upload the images (and optional video) and drag them into the timeline.
- In Google Photos on mobile you can use the built-in Movie or video creation tool to pick your images.
- In iMovie, choose Movie, import your images and begin editing.
Step 3. Arrange and edit
- Once your pictures (and optional video clips) are imported, arrange them on the timeline in each app.
- Adjust the duration of each image (3–5 seconds is a good rule of thumb), reorder as needed, and add basic editing such as splitting or trimming (especially for clips in Clipchamp or iMovie).
In Clipchamp you can drag each asset to adjust duration, transitions, and sequencing.
Step 4. Add music, text and effects.
Adding audio and captions brings your slideshow to life. Most editors make it easy to add text, shapes and music from a built‑in library. Be sure to choose royalty‑free music (sites like Pixabay’s music library have hundreds of free tracks) and adjust the volume so it doesn’t overpower your visuals. Text overlays can provide context, highlight milestones or include calls to action. Keep the fonts simple and legible.
Step 5. Preview and export
Before you publish your video, watch it from beginning to end.
- Check that transitions are smooth, images aren’t poorly cropped, and audio/text are synced.
- In iMovie, Microsoft Photos legacy (Finish video), or Clipchamp (Export) you’ll choose the resolution (1080p is usually sufficient for most uses).
- Then save your video as an MP4, share it on YouTube or other platforms, or download it for later use.
Also Read: Video Swap Face AI: How to Change Faces in Any Video – Free Apps & Pro Tips
How to Convert Photo to Video Online
Online tools are perfect when you don’t want to install software. They run in your browser, offer templates and work across devices. Popular options include Canva, Animoto, Vimeo Create and Kapwing. The steps mirror those in desktop apps, with a few differences:
Step 1. Choose an online editor
Pick an editor that suits your needs.
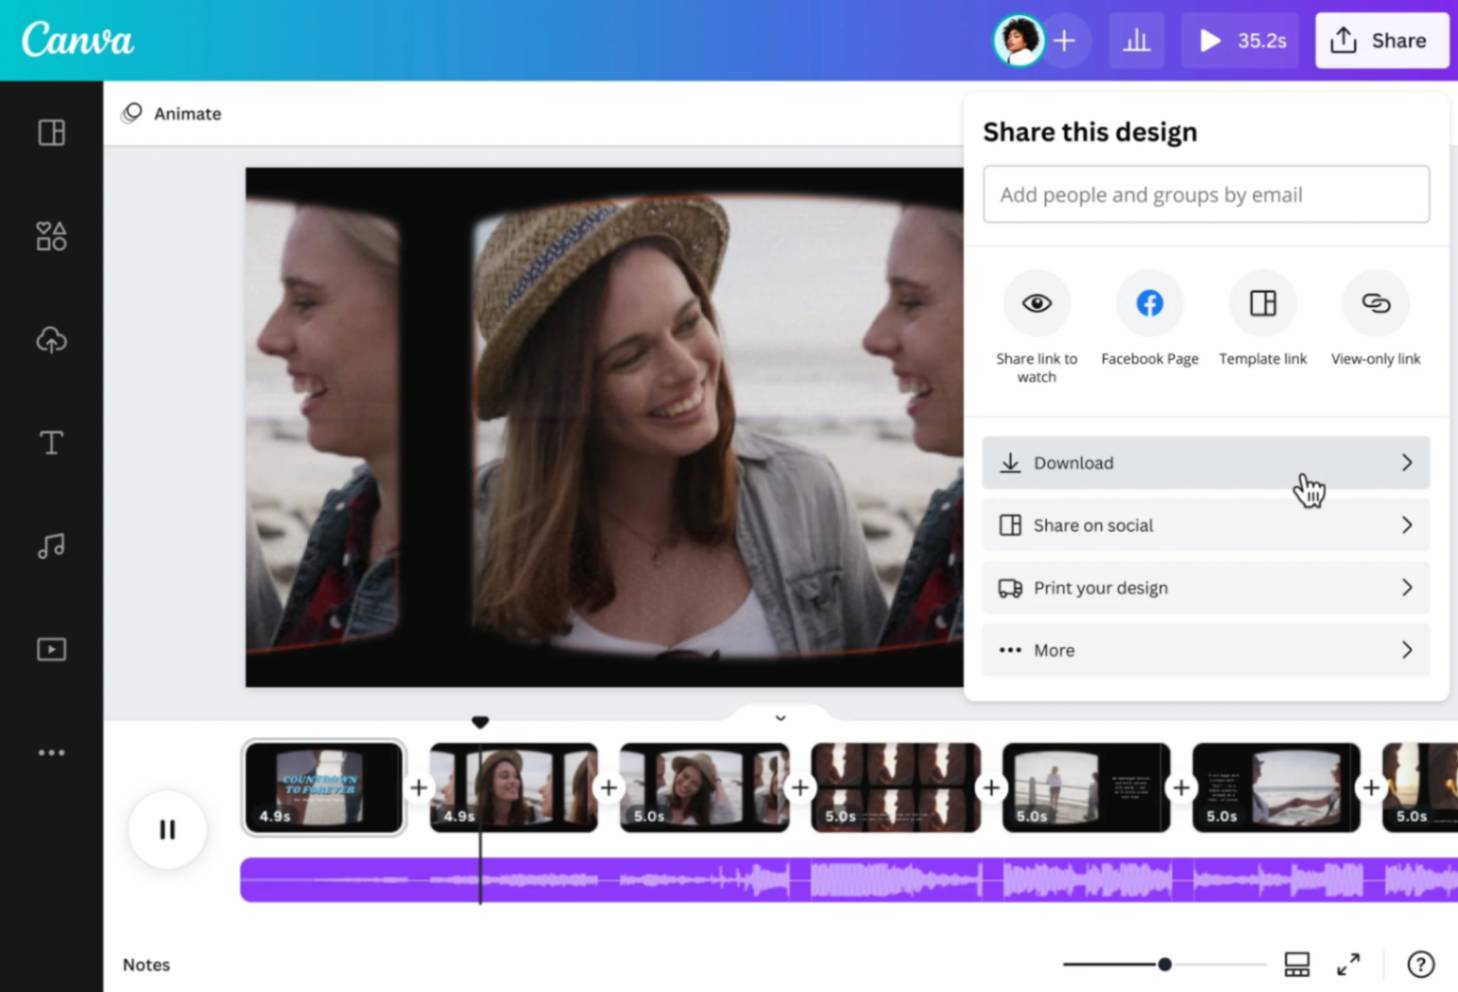
Canva’s Online Photo Video Maker offer drag-and-drop interfaces and hundreds of layouts.
- Animoto is built around guided slideshow creation with music.
- Kapwing and Vimeo Create let you trim, resize and add subtitles through simple web-based editors.
- Most platforms have free tiers, though export options and watermark rules vary depending on the elements or plan you use.
Step 2. Upload and arrange
Upload your photos, then use the web-based timeline or storyboard to reorder them. Many tools include preset transitions and animations—subtle fades or slides usually work best so they don’t distract viewers. If the platform supports adding both images and short video clips, blend them to create more visual depth.
Step 3. Customize with music and style
- Select a background track from the site’s built-in library or upload your own.
- Adjust the timing of each slide to match the mood or rhythm of the audio.
- Explore filters, color themes and fonts to match your brand or story.
For example, Canva’s timeline lets you change the duration of each image and add animated stickers or text to enhance your visuals.
Step 4. Export and share
Once satisfied, export your video. Online editors typically allow downloads in MP4 format and direct sharing to social platforms. Free plans may limit file size or resolution, so check your export settings before finalizing. If you need higher quality, consider upgrading or doing final polishing in a desktop editor.
Also Read: How Do I Change a Face on a Picture? Step‑by‑Step Guide to Changing Faces in Photos & Videos
Face Swap AI’s Image-to-Video Creation

If you want to turn a single photo into a dynamic video rather than compile multiple images, FaceSwapAI’s Image-to-Video tool is a game changer. Upload a clear photo, type a description of the scene you want, and let AI generate an animated clip that matches your prompt. It’s perfect for bringing portraits to life, animating characters or visualizing concepts.
Because it’s AI-driven, it requires no editing skills—just imagination. Swap. Create. Amaze. Try the Image-to-Video creator and see how your still image transforms into a moving scene.
Photo‑to‑Video AI Apps
The past few years have seen a surge in AI apps that automate video creation. These tools use generative models to animate faces, generate motion and even predict future appearances.
Here are a few examples:
AI Slideshow Makers
Apps like Descript and Lumen5 use AI to auto‑crop images, suggest transitions and sync your slideshow to the rhythm of your soundtrack. They save time and make professional design accessible to beginners.
AI Face Animation and Identity Exploration
FaceSwapAI offers more than simple slideshows. Its AI Face Swap Lab lets you upload two photos and instantly swap faces, blending lighting and skin tones naturally. The Multi‑Face Swap and Batch Face Swap tools handle group photos and multiple images, while the GIF Face Swap feature inserts your face into animated GIFs.
These playful features encourage users to experiment with different identities. When you’re ready to share your creation, the platform generates HD results free of watermarks and with strong privacy protections.
Predictive and creative AI tools
FaceSwapAI also includes Predict Baby and Skin Retouch tools. While not directly about slideshows, they demonstrate how AI can transform images beyond basic video creation. The NSFW Text‑to‑Video generator caters to adult audiences, turning descriptive prompts into video content with strict guidelines and secure processing. These features highlight the platform’s commitment to limitless creativity and user empowerment.
Also Read: Best Face Swap App Guide 2025 – Top AI Face Swapping Apps, How‑To, Tips & Ethics
Make a Video with Pictures on iPhone
Mobile phones make photo-to-video editing extremely convenient. On iOS, the native Photos app includes a Memories feature that automatically creates mini-movies from your albums, complete with music, titles and transitions.
For more control, you can use iMovie on iPhone:
Step 1. Open iMovie and tap Create Project, then choose Movie.
This brings you into a blank timeline where you can start assembling your slideshow.
Step 2. Select your photos from your camera roll and tap Create Movie.
Your images will appear on the timeline, ready for editing.
Step 3. Reorder and adjust timing.
Tap a photo to change its duration, drag clips to rearrange them and add transitions for smooth movement. iMovie applies the Ken Burns pan-and-zoom effect by default, but you can adjust or disable it if you prefer static frames.
Step 4. Add music and titles.
Pick a soundtrack from iMovie’s built-in library or import one from your files. Use the title editor to add captions, labels or intro text to your video.
Step 5. Export and share.
Tap Done, then Share to save your finished movie or post it directly to social media.
Android users can create similar videos using Google Photos’ Movie maker (found under Library → Utilities → Movie). Select your images, choose a theme and soundtrack, and Google will automatically assemble a short movie for you. Afterwards, you can reorder clips, adjust duration and swap out music to refine the final result.
Also Read: Face Swap Pictures: How to Swap Faces in Photos with AI Tools & Creative Ideas
Creative Tips to Make Your Photo‑Based Video Stand Out
Tip 1. Tell a story.
- Arrange your images in a way that guides viewers through a narrative.
- Introduce the subject, build the scene and finish with a strong ending.
- If you’re highlighting a product, start with a wide shot, move into details and end with a call to action.
- For travel videos, begin with departure, follow the journey and conclude with a memorable moment.
Tip 2. Use smooth transitions.
Transitions help the viewer focus on your content instead of abrupt jumps.
- Simple cross‑fades or slide transitions feel professional and avoid distraction.
- Avoid using every transition available; consistency looks more polished.
Tip 3. Match the music to the mood.
- Choose a soundtrack that complements the visuals—calm for nature scenes, energetic for sports, or playful for family moments.
- Adjust slide durations to the beat to create a rhythmic flow.
- If you’re unsure where to find music, use royalty‑free libraries like Pixabay or Incompetech.
Tip 4. Add captions and graphics.
Captions explain context, especially if your video will play without sound.
- Use on‑brand fonts and colors.
- Simple graphics like icons, arrows and progress bars can emphasize key points.
- Add shapes or waveforms to show viewers how far they are in the video.
Tip 5. Use high‑quality visuals and consistent aspect ratios.
- Ensure all images are the same resolution and orientation (e.g., 16:9 for YouTube, 9:16 for TikTok).
- Mixing aspect ratios can leave black bars or cause cropping.
- If you must use portrait and landscape photos together, add blurred backgrounds or frames.
Tip 6. Experiment with FaceSwapAI for a fun twist
Once you’re comfortable creating slideshows, have some fun with FaceSwapAI’s creative tools. Swap your face into your favorite movie scene, transform group photos into hilarious mash‑ups, or use the Image‑to‑Video tool to animate yourself as a superhero. The platform’s intuitive interface and friendly guidance mean there’s no learning curve—just magic.
Frequently Asked Questions (FAQs)
How can I make a video from my photos?
Choose a video editor (desktop, mobile or online), upload your images, arrange them on a timeline, add transitions and music, then export your video.
Which tool can I use for free?
iMovie (macOS/iOS), Microsoft Photos (Windows), Google Photos (Android/iOS) and free plans of Canva, Kapwing or Animoto are great starting points. For AI‑powered fun, FaceSwapAI offers free trials of its Image‑to‑Video and Face Swap labs.
How do I make a video with pictures on my iPhone?
Open iMovie or a similar app, import photos from your camera roll, drag them onto the timeline, add music and text, then export. You can also let the Photos app create a Memory movie automatically and edit it to your liking.
Is there an AI that can turn one photo into a video?
Yes! FaceSwapAI’s Image‑to‑Video tool and similar AI services take a single photo and a text prompt, then generate a short video that brings the image to life. It’s fast, fun and requires no editing skills.